
It’s important to keep your contacts organized and help save credits. Let’s look at the difference between opting out contacts and deleting them.
- Opting Out: blocks the contact from receiving messages unless they opt back in by texting in your Keyword.
- Deleting: removes the contact from your list but you have the option of adding them back manually
If a contact has opted out, they will be blocked from receiving text messages from your 10-digit Textable number. Even if you try to upload their contact again, the system saves this information so you won’t have to.
There are few ways to opt-out a contact, or they have
the option of opting out themselves
1. Show them the way out: to opt-out on their own saves you time. We recommend that you use our auto-append reply STOP to end at the end of your text messages. When a contact replies STOP to your text, they will automatically be opted out from your contact list which saves you time. Other automatic opt-out words include remove, cancel, or take me off your list.
TIP: This is an industry best practice and not an EventTexting requirement. However, it is suggested by major phone carriers and the CTIA.
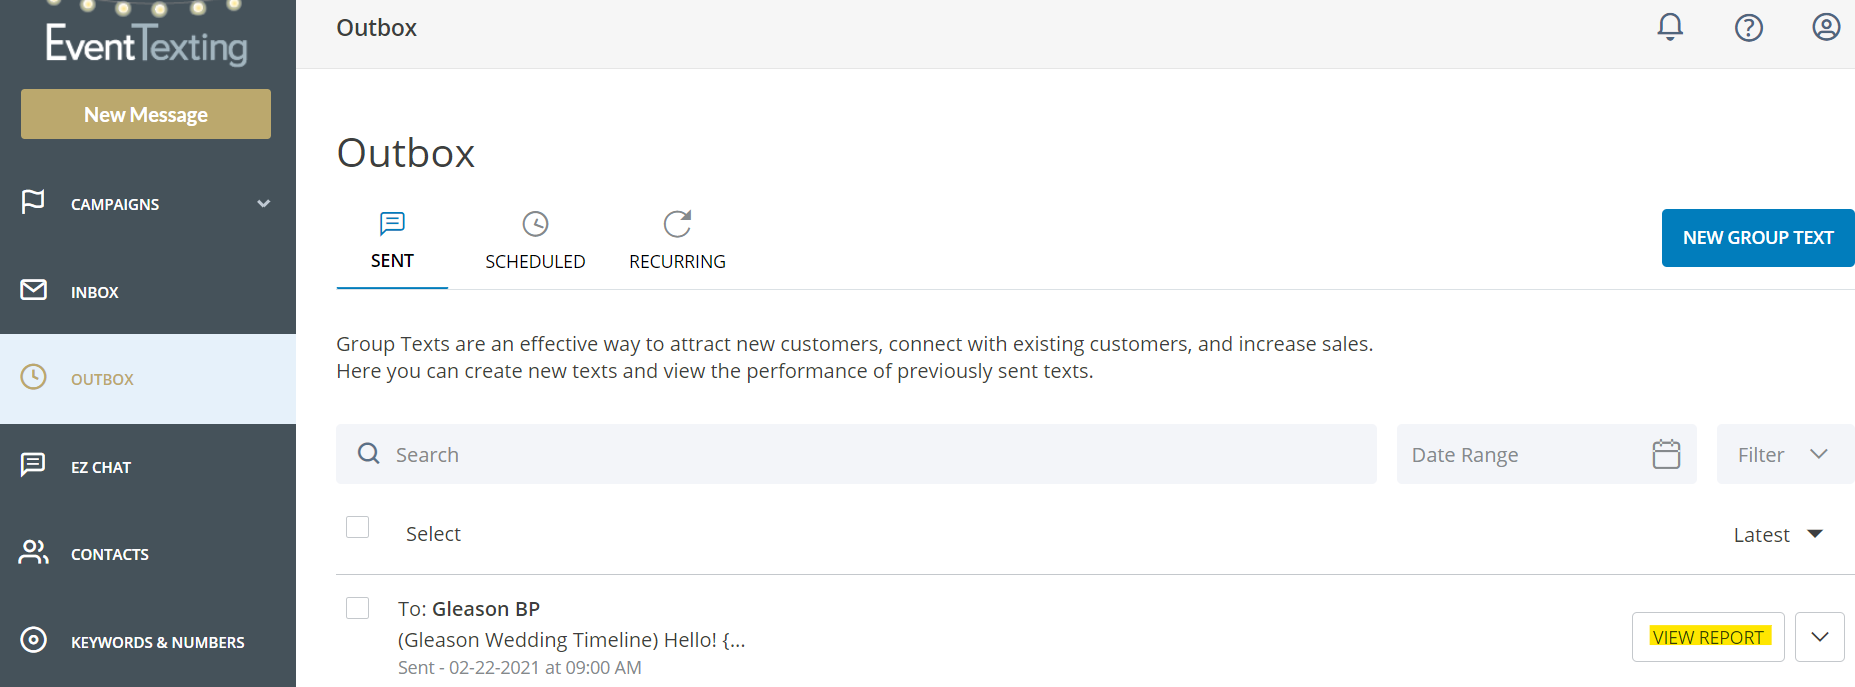
2. Delivery Report: Your Outbox shares valuable information about what messages were received and what may have Bounced. To view a report, click on View Report under the Reports column on the message you last sent to a group of contacts in your Outbox.
Scroll down and click directly onto the word Bounced in your report. To the right, you will see the option to “Opt-out these contacts.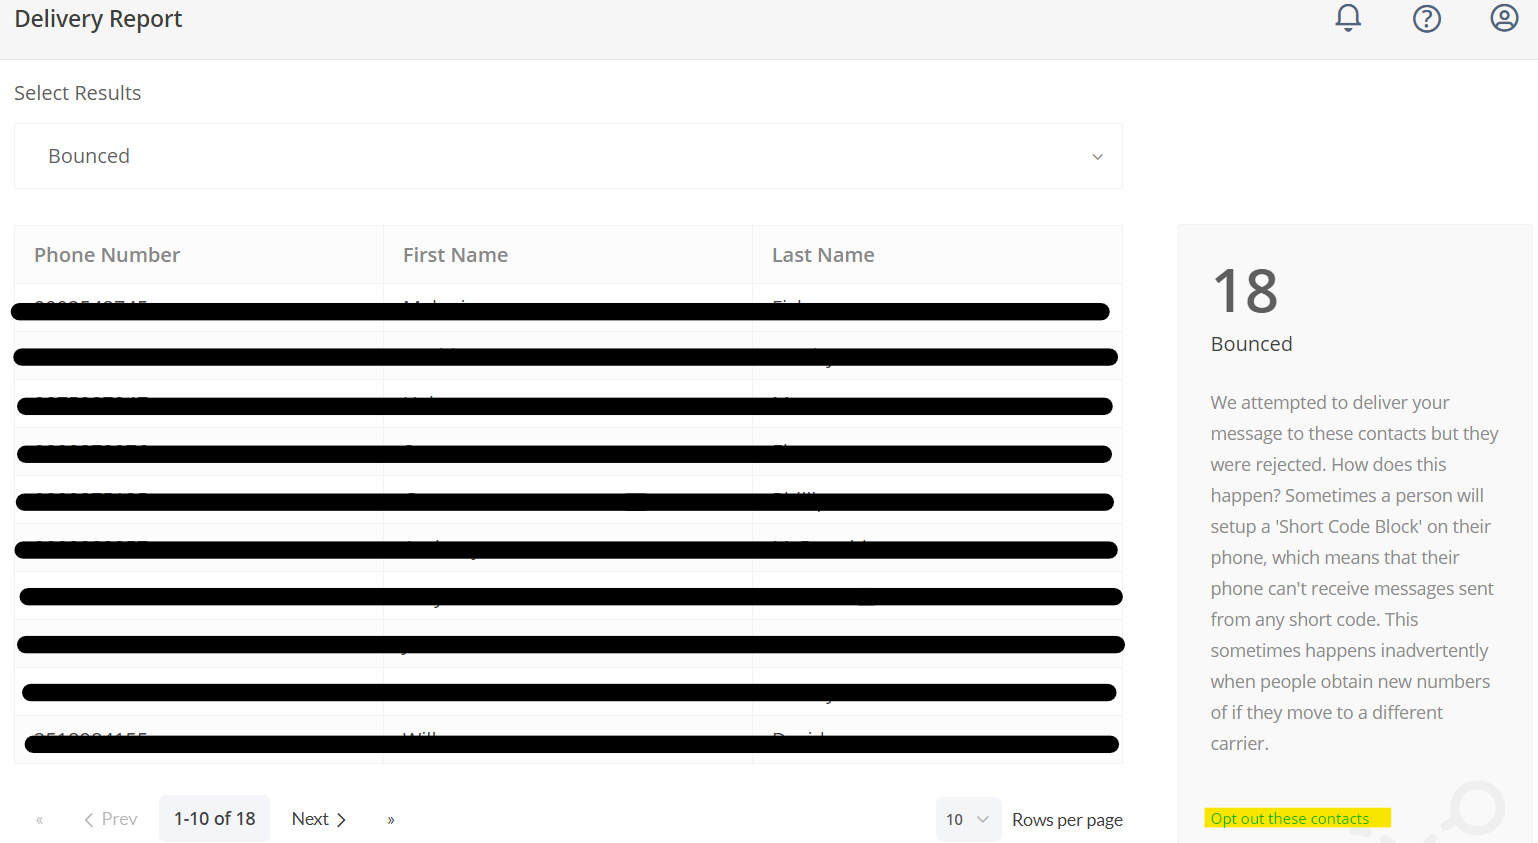
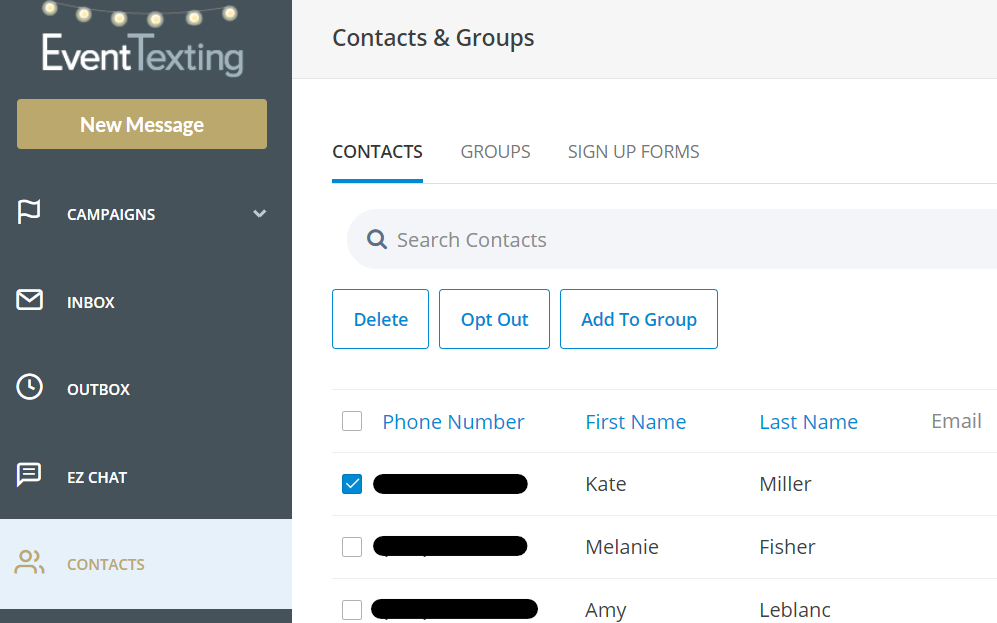
3. Under Contacts: search the contact by first name, last name, or a number and check the box next to the contact you wish to opt-out. You will see an Opt-Out button appear at the top in between Delete and Add to group. Click to opt-out the contact. You will be asked if you are sure you want to opt out. If yes, click confirm and that contact has been opted-out.
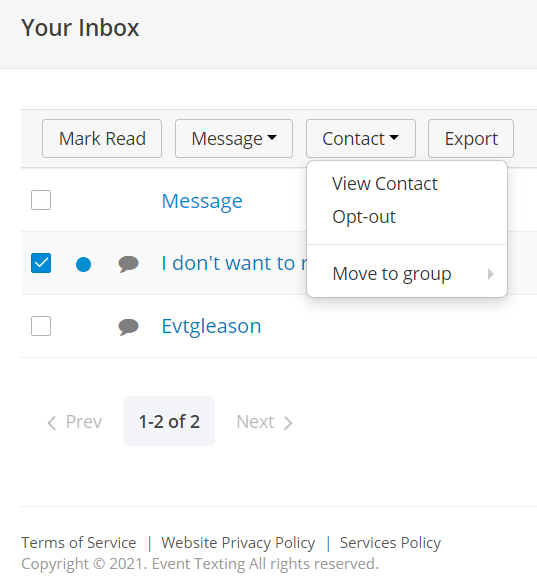
4. Inbox: People may send you messages to your Inbox that have chosen not to use the automatic opt-out REPLY. Instead, you may receive a message like, “I don’t want any” or “stop sending me messages”. Simply check the box next to the left of the message. Click the drop-down menu on the Contact field and select Opt-out. You will also notice you have the option to View Contact or Move to a group. Both are useful when wanting to view information about that contact and add them to a specific group.
If you like to view which contacts are opted out, use the filter on the Contacts page and select the “Opted Out” status.

How to Delete Contacts
Deleting contacts allows you to have the option of adding contacts back manually if you decide that you want to keep their number. This is entirely different from opting out since the contact will not have to use the keyword to opt back in to be added back to your list.
1. Go to the Contacts page and search for the contact.
2. Check the box next to the contact you wish to delete
3. Click Delete from the options above the contact
TIP: To Delete, Opt-out, or Move to Group with more than one contact, check multiple contacts manually, or check the top box next to “Phone Number” to select all contacts on the page at once.
For more contacts to be displayed on a page, toggle the “Rows per page” option at the bottom right corner of the page to display more contacts. 