
When someone texts your business or event Keyword to your 10-digit Textable number (e.g. “Text Bliss to XXX-XXX-XXXX to receive messages from Bliss Weddings and Events), they are opting in. They immediately get a customizable auto-reply text letting them know they are part of your business group or event texting list. It also includes a message to reply STOP at any time to then opt out of the list. This is the easiest and most common way to gather subscribers and add them to a list.
Adding Individual Contacts
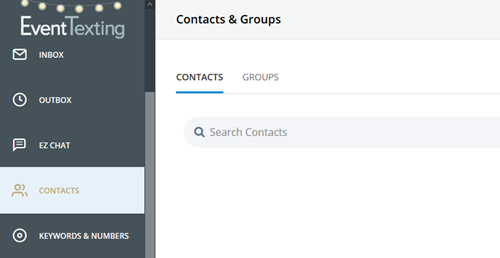
- Log in to your EventTexting account
- On the left navigation panel, click Contacts to open the Contacts & Groups page.
- On the Contacts & Groups page, click the Add Contacts button.
- Enter the contact’s info into the appropriate fields (First Name, Last Name, Phone Number, Email). Any other information that you’d like to store about this contact can be added into the Notes field. Click the Create button. You have a new contact!
Custom Contact Fields
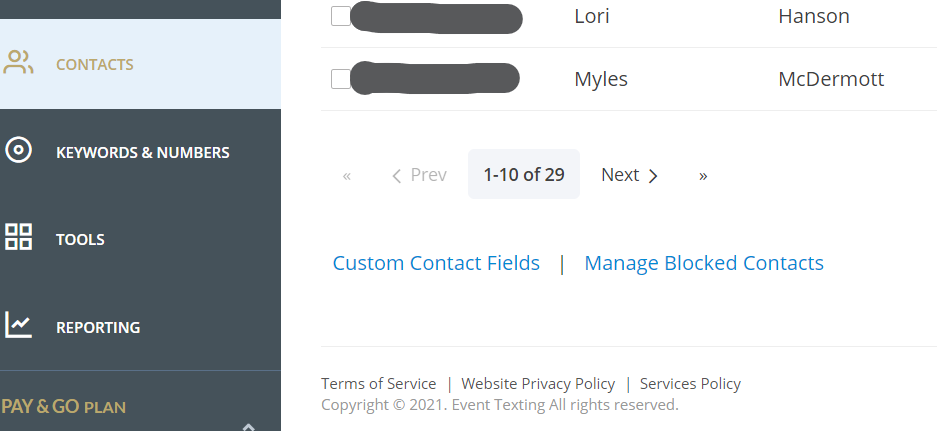
In addition to the standard contact fields, you can create up to five custom contact fields to store additional information about your contacts. Each custom field can store up to 10 characters. Birthday and anniversary dates are common use, but it’s up to you! Locate this feature on the bottom left corner of the Contacts & Groups page.
To add Custom Fields go to the Contacts and Groups page and scroll down to the bottom of your contacts. The Custom Contact Fields option is highlighted in blue.
Just like the standard fields, the name or label you use for each custom field can be used to personalize the SMS text messages you send out. See How to Personalize Your Messages for details.
To remove a custom field just leave it blank. If you currently have a campaign scheduled or running, however, we do not recommend editing any custom contact fields that are being used in those campaigns.
Uploading / Copy & Paste Contacts from a Spreadsheet
- Repeat steps 1-3 as listed above.
- Select Upload in the top menu. You can drag your contact spreadsheet into the field or browse for the file.
- For ease of use, we have a contact list template you can download to use as well as a tutorial video you can watch.
- IMPORTANT STEP -After you upload your contact list using the dropdown menus to map the contact information to the appropriate fields within your EventTexting account. The phone number is the only required field. First Name, Last Name, and Notes are the other default options. This is called Mapping.
- Copy and Paste- Copy and paste contacts from a .csv file. Enter one contact per line, separating fields using commas.
Contact Search Field
Use the contact search field to quickly locate a contact or click the drop-down menu for a more advanced search based on your custom contact fields.
Filtering Contacts
Filtering contacts makes it easy to see which contacts are in certain groups or to see how they were added to your list. To filter your contacts, click on the “Filters” button at the top right of the page.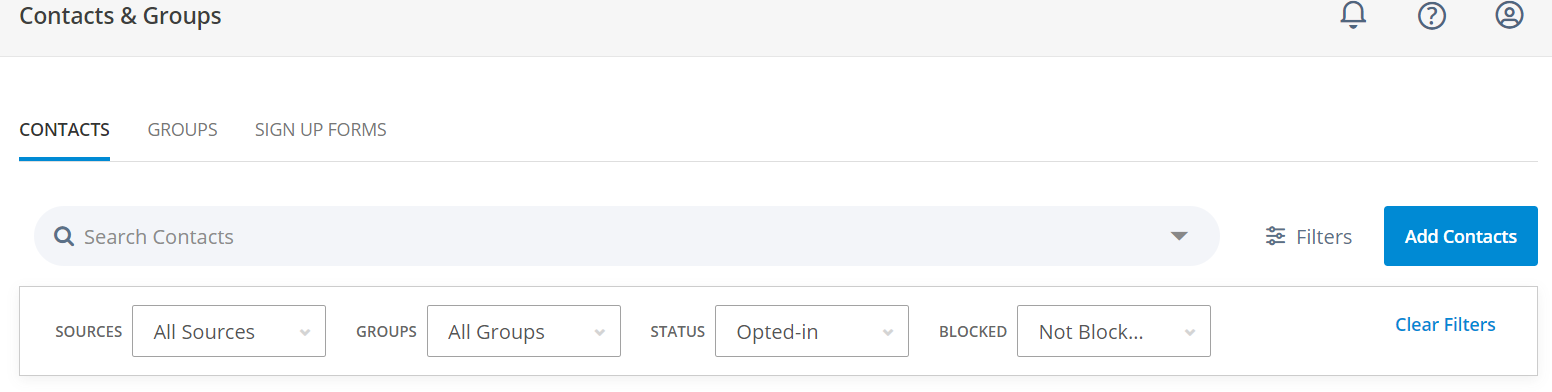
Edit Contact
To edit your contact just click on the phone number and then click edit.
Contact Management, Information, and History
Click on the checkbox next to the contact’s name to opt-out, delete or add a contact to a group(s). Click on the contact name to view their Contact Report which has their Message History. This page also has the export report option.
How to Add a Group
Keep your contacts organized by adding and removing them from your groups for strategic text messaging. If a contact is not assigned a group, it will be listed in “Unassigned Contacts”
We have ensured that if a contact is listed in multiple groups it will only be sent one message for that campaign. In other words, if you have chosen five different groups to receive a text message and you have several contacts in more than one of those groups, they will only be sent the text message once.
- Click Contacts in your left navigation bar
- Click Groups which is listed in the middle of Contacts and Sign-Up Forms at the top left of the page.
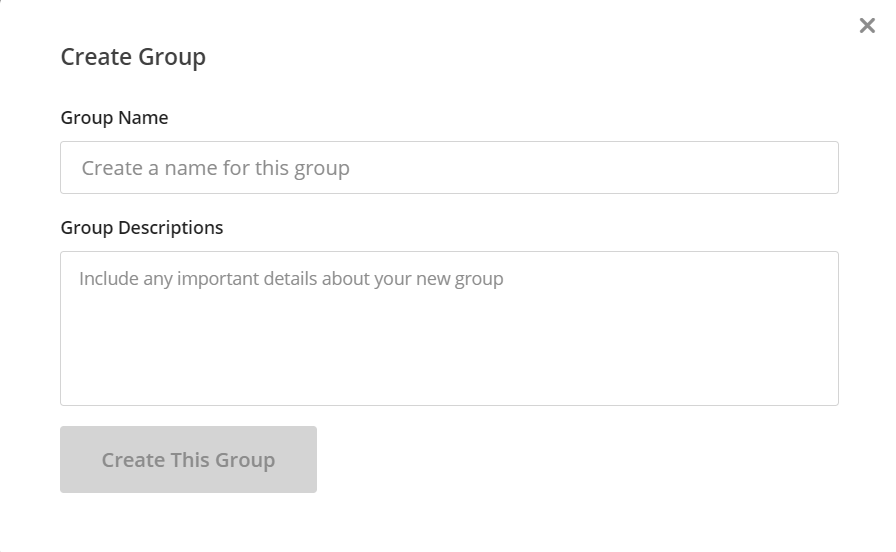
- Click the Create Group button on the right of the page
- Name your Group and add Notes to describe the group
- Click Create Group


To show individual contacts within a group, return to the Contacts and Groups page and click the filter icon next to the Contacts Search field. Click the Groups drop-down menu to find the group you are looking for. You can also view the Source, Status, and Block Contacts lists. The Source is how your contact was obtained, Status shows your opted-in and opted-out contacts and blocked shows your Blocked and not Blocked users
Click here for more on Deleting versus Opting-Out of Contacts